Upgrading or replacing interior doors is a fantastic way to breathe new life into your living space. Whether you're a seasoned DIY enthusiast or a novice looking to embark on your first home improvement project, fitting and hanging an interior door is a manageable task with the right guidance.
Materials You'll Need: Before you begin, gather the necessary materials and tools:
- Interior door
- Tape measure
- Pencil
- Screwdriver
- Level
- Wood shims
- Wood chisel
- Hammer
- Hacksaw or circular saw
- Drill
- Screws
- Door hardware (knobs, hinges)
Step 1: Measure Twice, Cut Once: Begin by measuring the height and width of the door opening. Subtract a small amount (1/8 to 1/4 inch) to allow for clearance and a smooth swing.
Mark your measurements on the door, using a straightedge to ensure accuracy.
Carefully cut the door along the marked lines using a hacksaw or circular saw. If you're trimming the bottom of the door, remove an equal amount from each side to maintain symmetry.
Step 2: Prepare the Door Frame: Remove the existing door and hardware.
Check the door frame for squareness using a level. If the frame is not square, use wood shims to adjust and make it level.
Chisel out any excess wood or paint build-up around the hinge and latch areas to ensure a proper fit.
Step 3: Install Hinges: Position the door on sawhorses or a stable surface.
Align the hinges with the marks on the door and screw them into place. Enlist the help of a friend to hold the door steady during this step.
Test the swing of the door to ensure it opens and closes smoothly.
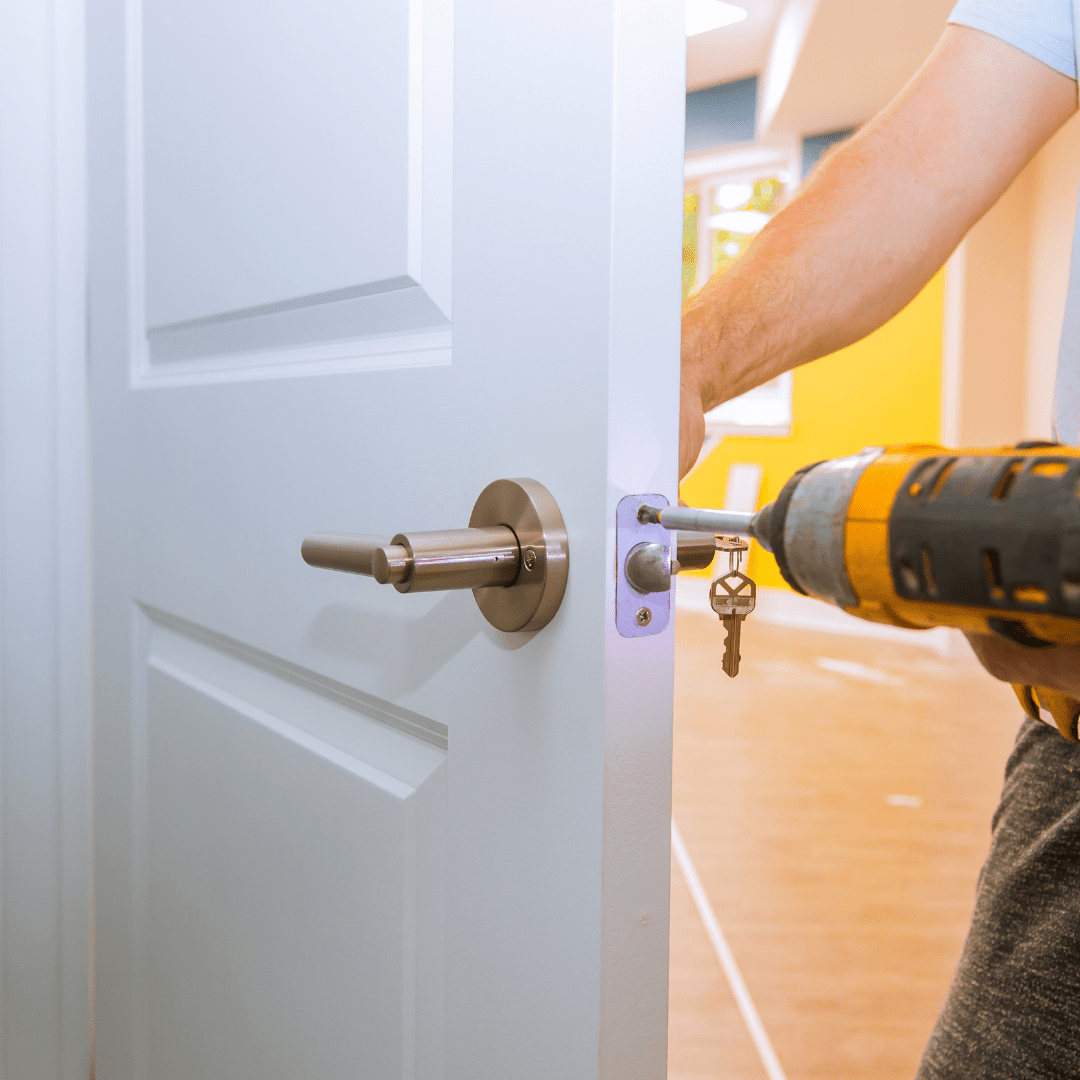
Step 4: Install the Door Knob and Latch: Mark the location for the doorknob and latch on the edge of the door.
Use a hole saw or spade bit to drill the holes for the knob and latch.
Install the doorknob and latch mechanism according to the manufacturer's instructions.
Step 5: Hang the Door: Position the door in the frame, fitting the hinges into the corresponding recesses on the door frame.
Secure the hinges to the frame with screws.
Check the door for proper alignment and adjust as needed using shims.
Step 6: Fine-Tune and Finish: Ensure the door opens and closes smoothly without any resistance.
Make any necessary adjustments to the fit or alignment using shims or additional trimming.
Apply a finish or paint to the door according to your preferences.
Congratulations! You've successfully fitted and hung your interior door, adding a touch of craftsmanship to your living space. With patience and attention to detail, this DIY project can enhance both the functionality and aesthetics of your home.